An email autoresponder or drip campaign is a great way to keep people interested in your company. Autoresponder campaigns allow you to send a series of automatic follow up emails to any Contact Group. These email templates are delivered in sequence which starts at the moment a contact is added to a group. The sequence proceeds at specified time intervals complete with Remove unsubscribe links and Merge Tags to personalize your autoresponder templates, so they look like one-on-one communications personally from you.
How to set up an Email Autoresponder campaign
- First, plan out your autoresponder sequence. Write each email and figure out the timing of the delivery. When you’re ready to set it up in Relenta, proceed to step 2.
- Click Settings > Email Autoresponders. (The settings icon looks like a small gear in the upper-right corner of Relenta.)
- Click the blue +Autoresponder button to add a new campaign.
- Pick which Group you want to receive your autoresponder sequence. Each time a contact is added to this Group, they will begin to receive this sequence of emails.
- Create the first email in your autoresponder sequence. Pick the sending email address from the From: dropdown.
- You can either choose an email you’ve saved in the Response Library, or write a new one. Be sure to include merge tags like [FIRST] in your email to personalize it.
- After your email is finished, choose how many days you want to wait before you send the first email. If you put a zero (0) in the field, the first email will be sent as soon as a person is added to the group.
- Click Save. Your autoresponder campaign will now appear in the list of Email Autoresponders.
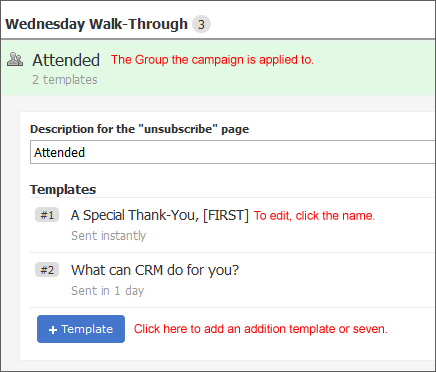
- To add additional email templates, click your campaign name. You will see a list of all your templates. Click the +Template button to add an additional email. Repeat steps 4 through 7 for each new template.
- Once you’ve finished adding all of your templates, you’ll notice that your campaign has a toggle switch on the far right set to Stopped. Click the Stopped button and it will switch to a blue Running button. This means your campaign is now active. All current Group members will begin receiving the campaign and any new members will start the sequence as soon as they are added.
Note: Whenever you edit your autoresponder campaign, it will be switch to Stopped. So after you’ve finished editing it, make sure to switch it back to Running.